You can make your subject look great in complementary colors. The color of the clothing is what can make or ruin a photograph. Contrasting a blue sky with a bright red shirt will make your subject pop. You can also use complementary colors when you take photos of humans. These are just a few examples. One of these options can be used next time you visit a natural photo shoot.
Third-party rules
There are many ways to make your photo more interesting and appealing. The rule of thirds is a great way to make your photos more attractive and to improve the composition. You will not be able to experiment with your composition or creativity if you violate this rule. However, professional cameras are not necessarily the best. It is possible for mistakes to be corrected during the process. Here are some tips to keep in mind when using the rules of thirds in photography.
Rule of thirds to capture a landscape
Remember the Rule of Thirds when taking landscape photos. Landscapes have no clear subject. It's difficult to place critical information in a central area of an image when there isn't. Instead, you should place the horizon, and a point or interest, in the upper, and lower, thirds of your image. This is a good technique for group shots in which you want sky, ground, people to be equal. The Rule of Thirds will make the composition more pleasing to the eye.
Use a wide-angle lens
Using a wide-angle lens for landscape photography can be a great way to emphasize the foreground. Photographers of landscapes often have to overcome challenges when trying to capture a scene with a shorter lens. Because it makes distant objects appear closer, a wide-angle lens is an excellent choice in these situations. It is an excellent choice for capturing sunrises and sunsets.
Using a flash
When using a flash, it's important to remember that the light it casts is artificial. The flash's light fill doesn't have the same effect on the subject as the key light. The flash's intensity as well as duration cannot be controlled by the photographers. In fact, the camera automatically adjusts flash compensation for too bright ambient light. The flash can be used to fill in shadows and reveal additional textures.
Use a tripod
A tripod's depth of field is one of the most important aspects to consider. A tripod can make it easier to achieve sharp images even when the vantage point is low. A tripod can be used in such situations to reduce the light entering the camera. A tripod can be used to slow down shutter speed and allow in more light. A tripod can also keep your camera still when you are shooting in windy conditions.
Using a macro-lens
Macro lenses are great for nature photography. This type of lens magnifies detail and is great for portraits, landscapes and other types photography. True macro lenses can be set up to focus and aperture in a variety of settings. Here are some tips to help you use this type lenses to capture your subject at its most realistic size. These tips will ensure that you capture the most flattering shots of your subject.

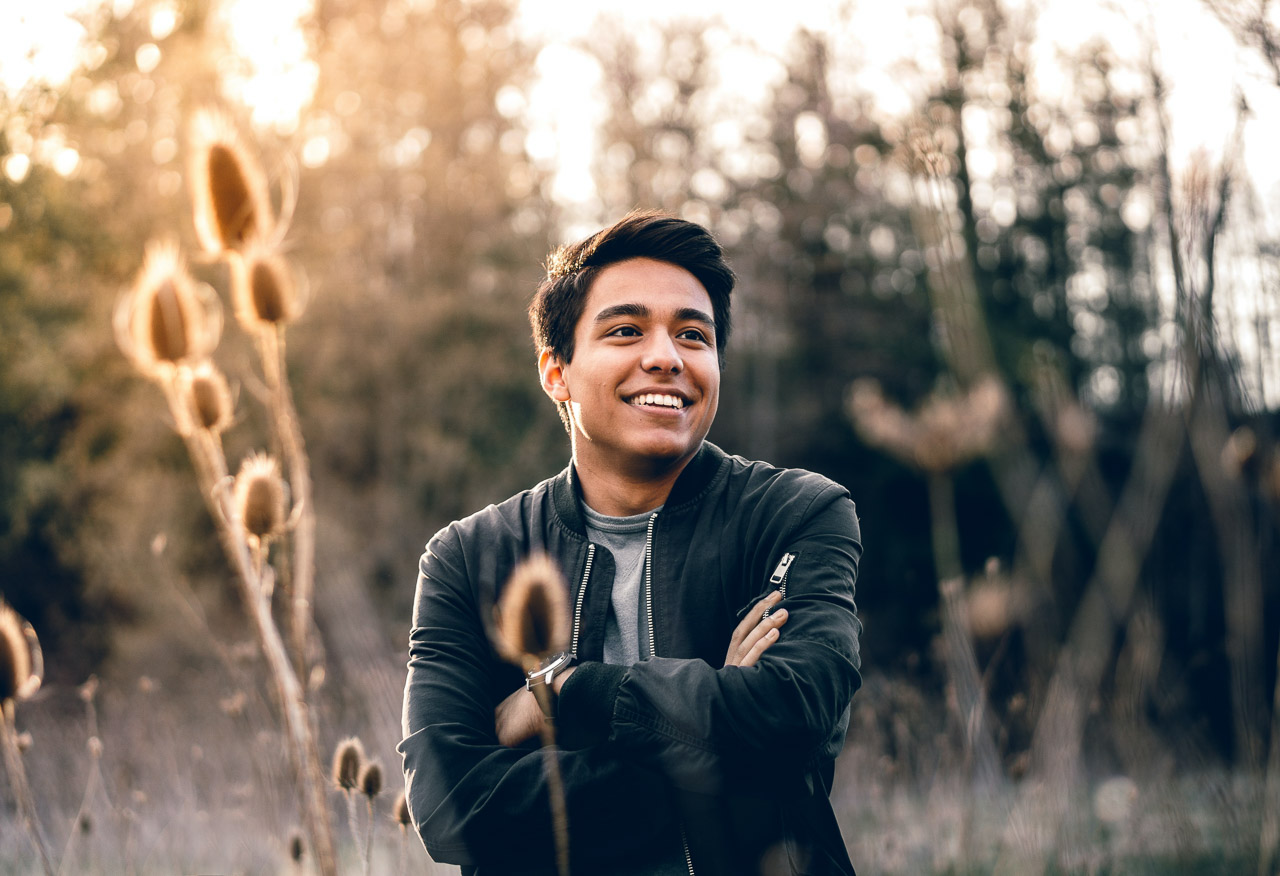
Using your iPhone camera
Using your iPhone camera for photography ideas nature can be as simple as taking a few photos of the surroundings around you. You can make use of the wide depth of field of the camera. This feature makes it easy to capture subjects with blurry backgrounds, without needing to purchase an additional lens. To get professional photographer-quality photos, you can also use Portrait Lighting on your iPhone. You can also create dramatic moody photos by using the Contour Light and Stage Light modes.
FAQ
Which camera is best for beginners?
The best camera for beginners will depend on your budget, needs and level of skill.
If you are looking to save money, then a point and shoot digital camera might be the best option. These cameras have a good quality, but they are not very versatile.
A DSLR (Digital Single Lens Reflex) camera has interchangeable lenses that let you shoot different types of shots. These lenses are usually more expensive than point-and shoots, but offer greater flexibility.
For beginners to photography, the beginner's set is a great place for you to start. Everything you will need, including a tripod, flash, memory cards and lens, can be found in one package.
Do not forget to get extra batteries!
Is digital photography hard?
Digital photography isn’t as easy as you may think. To use digital photography properly, it takes patience and effort. You need to know what settings to use for different types of shots. Learning by doing is the best way to learn. Practice makes perfect.
Which Lenses should I Use?
The most common question beginners ask is, "what lens should I buy?" There are many options. It can be difficult to make a decision.
The good news is you don't always need to buy a different lens with every purchase of a camera. You can simply add lenses later.
Here are three types of lenses to start with.
-
Wide Angle Lens (14mm - 24mm): These lenses give you a wide angle of view, allowing you to capture more of your subject. You can zoom in to improve image quality.
-
Normal/Standard zoom lens (28mm -70mm). These lenses allow the user to adjust focal lengths while still maintaining good image quality.
-
Telephoto Zoom Lens (70mm to 200mm): These lenses make it easy to capture distant subjects. These lenses allow you stay focused on your subject even when they appear small.
Combining lenses can create different effects. You can use a normal lens for close-up detail and switch to a zoom lens to capture distant objects.
How do I learn to take photos on my own?
There are many different ways to learn how take great photos. There are several options. You can read a book, go to a class, or join an internet community. But if you want to master the art of taking pictures, there's nothing better than doing it yourself! That way, you have complete control over what goes into each photo. And as long as you keep learning, you'll always improve.
In fact, one of the best things about digital photography is that you don't even need expensive equipment. All you require is an internet-enabled computer and a good camera. All else is up to you.
Here are some tips to get you started.
-
Familiarize yourself with the manual settings for your camera.
-
Learn how the basic controls work.
-
Make sure to take lots of pictures.
-
Make sure to edit them.
-
Share them.
-
Keep practicing.
-
Experiment.
-
Try different angles and perspectives.
-
Use light sources creatively.
-
Practice makes perfect.
-
You don't have to be afraid of failing.
-
Be patient.
-
Have fun!
Which Camera Should I Buy?
It all depends upon what kind of photographer your goal is to become. A basic point and shoot camera is enough if you are just starting.
Once you have mastered the basics you will likely need something more advanced. It really is up to you what you prefer.
These are some things you should consider before buying a camera.
-
Features: What features are you looking for? Are you going to use autofocus, manual settings, or both? How many megapixels do you have on your camera? Is there a viewfinder?
-
Price: How much are you willing and able to spend on your camera? Are you looking to replace your camera every few years?
-
Brand: Will you be happy with the brand you select? You shouldn't settle for less.
-
Functionality: Can your camera work in low-light conditions? Do you have the ability to take high-resolution pictures?
-
Image Quality: How clear, sharp, and crisp are your images.
-
Battery Life: How much time will your camera last without needing to be recharged?
-
Accessories: Will you be able to attach additional lenses, flashes, etc. ?
What can I do to improve my photography skills with my phone?
Amazing photos are possible with minimal equipment. You can take amazing photos with just a phone.
It's easy to get started with the software.
There are many apps for iOS and Android devices that can edit and share pictures.
Here are five tips for taking better pictures.
-
Set Up Your Camera App. Your device should already have your camera app installed. If it is not installed, you can download it from Google Play.
-
Use Filters & Effects. Effects and filters allow you to alter the appearance of your photos without needing to touch them.
-
Adjust the exposure. You can control the brightness by changing your exposure.
-
Photograph in the Right Light Shooting in bright light makes it easier to see details in your subject. You can capture highlights and shadows in low-light conditions.
-
Photograph People. Photographing people can show others what you are most passionate about.
For more information on how to take better photos, read our article: 5 Tips to Improve Your Photography Skills With A Smartphone
Where to Buy Cameras?
There are lots of places online where you can buy cameras. B&H Photo Video is a reliable retailer. They have knowledgeable staff who can answer all your questions.
B&H ships quickly and securely to make it easy for you to get your order to your door.
You can learn more by watching this video about shopping for cameras.
Statistics
- This article received 13 testimonials, and 100% of readers who voted found it helpful, earning it our reader-approved status. (wikihow.com)
- The second easiest way to get blurry photos 100% of the time is to use a cheap filter on the front of your lens. (photographylife.com)
- By March 2014, about 3 million were purchased monthly, about 30 percent of the peak sales total. (en.wikipedia.org)
- While I cannot prove that all of those spots were not sensor dust, the photo was taken during a heavy snowstorm…so I guess that 99.8% of the spots are snowflakes. (bhphotovideo.com)
External Links
How To
How to photograph in low light conditions
Low-light photography means taking photos in dimly lit areas. It requires special equipment. The main challenges are controlling exposure, white-balance, and sharpness. Low light photography can be divided into two categories: ambient and flash. Flash photography works well when you have enough light. But if there isn't enough natural light, then you'll have to use a flash. If your subject is outdoors but indoors, you might not have enough light to take a great picture without a flash. You can also shoot at night when the moon is shining. This way, you'll get some nice colors and shadows. Another option is taking photos at twilight. Twilight is when the sun sets but there's still daylight.
Long exposures may be something you want to explore. Long exposures can be used to capture images even if the shutter has been closed for several minutes. The shutter must be closed so that the camera only records light that hits the sensor. This light will continue to fall onto your sensor after a long exposure. The shutter is still closed so no light can enter the lens. This means that you will not see any movement. Turn off autofocus and autoexposure to ensure you get clear images. Also, make sure that you adjust the ISO setting before you start shooting. A 200 ISO setting gives you greater control over how dark or bright your image looks. When you're ready for the shot, press quickly the shutter button. This will bring the shutter completely to a close. Hold the shutter button down for the final second. To prevent additional light entering the camera, hold the shutter button down. Once you have taken your picture, wait for a few moments before you release that shutter button. This allows the camera time to process the photo. While your image processing is taking place, you will be able to view your photos on your screen. Once you are satisfied with the photos, save them onto your computer.