A wedding is nerve-wracking. But, proper preparation can help ease your nerves and give you many shots to add to the wedding album. You can use a checklist to help you prepare for the day. It is also a great way of becoming an expert in wedding photographer. My Profit from Portraits eBook has more tips and information.
Early arrival
There are many reasons why you might be arriving early to a wedding for the first time. You might be staying nearby or at the venue and want to see the area before everyone else arrives. It's possible that you underestimated how long it would take to get there or misread what time the wedding website said. No matter what reason, it is important to arrive 30 minutes early so you don't become a nuisance for other guests.
You will need to be there at least 15 minutes before the ceremony to ensure you have a spot and can talk with the celebrant. Before the ceremony begins you'll need to take photos alongside the mother of and father of the bridal party.
Bouncing
Bouncing at weddings is a great way to add extra entertainment to the reception. It's a wonderful and relaxing way to unwind after a long day. Bouncing at weddings is also an option to the first dance, and a great opportunity for photos!
Weddings are filled with joy, celebration, and laughter. These events are a perfect way to show your personality. You can add a little entertainment to your wedding to increase the energy and get everyone excited for the big day. In addition to being tons of fun, it's also a great way to break the ice among the guests. Bouncing is a fun and unique entertainment option that can be used in any wedding.
Guest as a frame for guests
The best way to feel the atmosphere of the wedding is by having guests serve as a front-row frame. It's possible to capture the beautiful smile of the bride and the incredible moments that unfold around her. These will be a rich collection that captures the essence of the wedding day.
Taking candid photos at a wedding reception
Taking candid wedding photos is a great way to document the wedding day. The candid wedding photographer is not interested in posing the guests. Instead, candid photography is all about capturing small details and telling a story. Photograph candid weddings in natural light. Make sure to use a white background and find the best lighting so the little details can be seen. A macro lens can be used to capture all the details.
You want to capture as many memorable moments of a wedding as possible when you are photographing it. This includes the bouquet and garter tosses. Remember that a wedding reception is an once-in-a lifetime event, and that your photos will last forever. It is important to make a list to ensure you capture all the details.
Flash using off-camera
Off-camera flash is something you can learn and apply in any type of wedding photography situation, regardless what your level. You can use off-camera flash to supplement natural light in a scene or provide additional light in a darker area. This video will teach you how to use your off-camera flash in many situations.
Before you use an off-camera flash, it is important to inspect the location where you will be photographing. This will allow for you to identify the best angles for your shots and help you choose the right locations. Once you've determined the best locations for your subject, you can add additional light with your off camera flash.
FAQ
What makes a camera bag good?
Camera bags are essential for protecting your gear during travel. These are the things to consider when shopping for a bag.
-
Sizing: A large bag will hold your camera and other accessories. Don't go bigger than you think you will need.
-
Durability: Buy bags made of durable materials like canvas, nylon or leather. Avoid plastic and fabric bags.
-
Protection: Make sure that your bag offers protection against dirt, moisture, and scratches
-
Organization: Organize your gear by type so you can quickly access what you need. You could, for example, place your lenses in one area, your memory card in another and your battery charge in yet another.
-
Comfort: Avoid carrying around a bulky bag when you are shooting. Instead, carry a shoulder belt. Look for comfortable designs with padded straps.
-
Price: Look around for the best price. Some brands sell their products at discount prices, which can be an added bonus.
-
Warranty: Ask if the company offers a warranty on its products. You will know who to call if your bag gets damaged.
Light Room is a great way to enhance your photos.
You can get great photos if you start early. It's always a good idea to take as many pictures as possible and then decide which ones will be the most valuable.
Lightroom allows this because it lets you see the effects of different settings on each photo. These settings can also be modified on-the-fly in Lightroom without ever having to open Photoshop again. This lets you quickly experiment with what looks great and what doesn't.
How do you get started in digital photography
If you are just starting to get into digital photography, the most important thing is to choose which camera you would like. There are many choices: DSLRs (digital single lens reflex camera), point-and shoot compact cameras and camcorders. Each camera has different benefits and features. For example, DSLR cameras offer high-quality images but are typically larger and heavier than other types of cameras. Point-and shoot cameras are smaller, lighter and have more automatic settings. Camcorders provide excellent video recording capabilities and may also feature still photo shooting modes. Smartphones are light and portable and can be carried around easily.
Once you've chosen the type of camera that you want, you can decide whether to purchase a used or new model. If the camera was purchased in the past few years, it is possible to find used cameras at reasonable prices. Because of the large amount of money that manufacturers spend on new technology, older models are more expensive.
Next, you will need lenses. Lenses play a key role in determining the quality of your photographs. They allow you to control the lens's focal length, allowing you to zoom into the scene without losing focus. Some lenses come with built-in flash units while others need external flash units. There are many brands offering a variety of lenses. Each brand has their own distinctive characteristics.
You will also need memory cards. Memory cards save pictures taken with your camera. Your card's size will determine how many pictures it can store. Multiple memory cards will be required if your plan is to take lots of pictures.
How can I learn how to photograph on my own.
There are many options for learning how to take great photographs. You have many options. You could purchase a book or attend a class. Or you could join an online group. There's no better way to learn the art of photography than by doing it yourself. This way you can control what goes into each photograph. You will continue to learn and improve, so long as you are willing to keep learning.
One of the best aspects about digital photography is that it doesn't require any expensive equipment. You only need a computer and an internet connection to take pictures. The rest is up for you.
Here are some tips to get you started.
-
Get familiar with your camera's manual settings.
-
Learn how the basic controls work.
-
Photograph lots.
-
These should be edited.
-
Share them.
-
Keep practicing.
-
Experiment.
-
Explore different perspectives and angles.
-
Use light sources creatively.
-
Practice makes perfect.
-
You don't have to be afraid of failing.
-
Be patient.
-
Have fun
How do I look beautiful in photographs?
The best way to ensure you look good in photos is to take them yourself. You'll learn how to pose for the camera, what angles are flattering, and which ones aren't. You'll also learn lighting techniques and how to use props to enhance natural beauty.
You'll discover how to choose clothes that fit well, make-up that looks great on you, and hairstyles that suit your face shape and style.
We will also help you retouch your images using Photoshop or another editing software, if you are not satisfied with the results.
Don't be afraid to take some self-portraits.
Statistics
- While I cannot prove that all of those spots were not sensor dust, the photo was taken during a heavy snowstorm…so I guess that 99.8% of the spots are snowflakes. (bhphotovideo.com)
- This article received 13 testimonials, and 100% of readers who voted found it helpful, earning it our reader-approved status. (wikihow.com)
- The second easiest way to get blurry photos 100% of the time is to use a cheap filter on the front of your lens. (photographylife.com)
- By March 2014, about 3 million were purchased monthly, about 30 percent of the peak sales total. (en.wikipedia.org)
External Links
How To
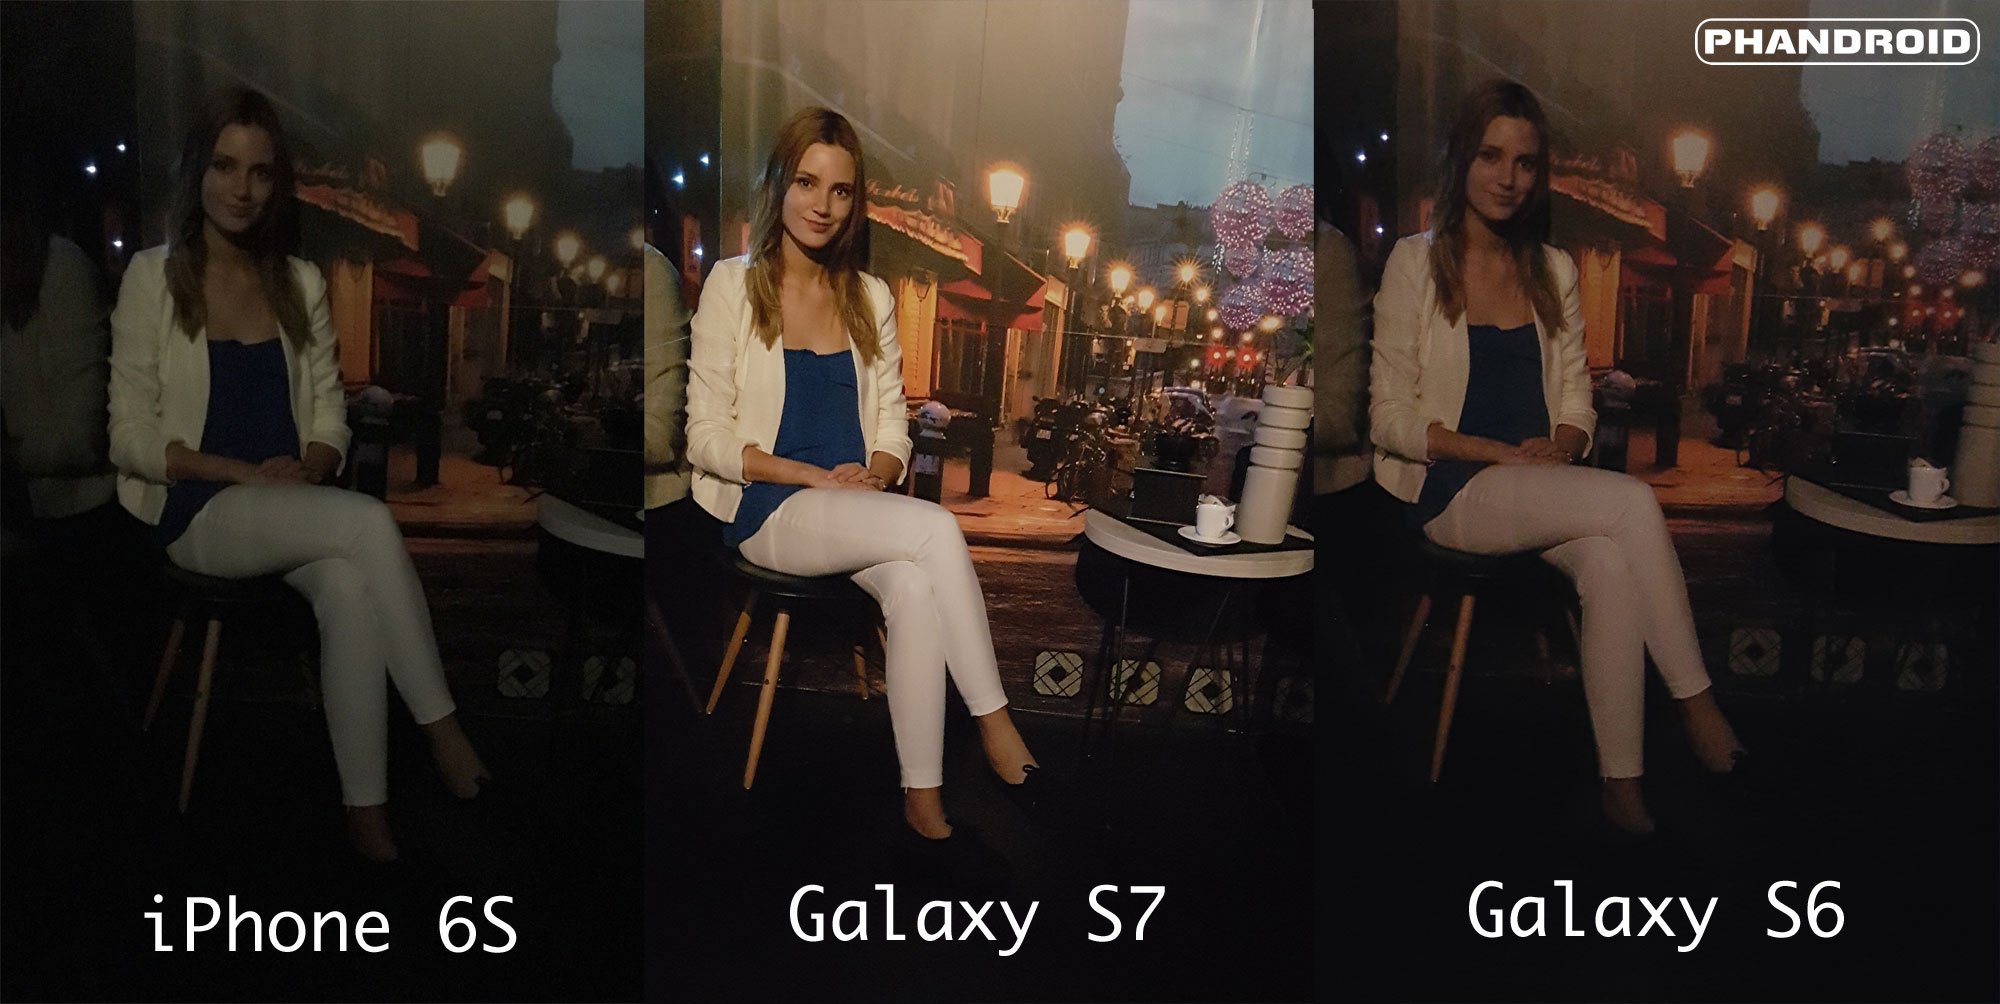
How to capture pictures under low lighting conditions
Low-light photography means taking photos in dimly lit areas. It requires special equipment. The main challenges in this field include controlling exposure, whitebalance, and sharpness. There are two types low-light photography: ambient and flash. Flash photography is best when there is enough light. If there isn’t enough natural lighting, you will need to use a flash. Without a flash, it is possible to get a poor picture if the subject is indoors and not outdoors. If you don't want to use a flash, try shooting at night during the moonlit hours. This way, you'll get some nice colors and shadows. Another option is shooting at twilight. Twilight occurs when there is still daylight but the sun has set.
Also, you might want to try long exposures. Long exposures allow you to record images after the shutter has been open for several minutes. When the shutter remains closed, the camera records only light that falls on the sensor. This light continues to fall onto a photo sensor throughout a prolonged exposure. Because the shutter was closed, no new light enters your lens. The result is that there is very little movement. To ensure you're getting a clear image, turn off any automatic settings like autofocus and auto exposure. Adjust the ISO setting before you start to shoot. An ISO setting of 200 gives you more flexibility to control how bright or dark your image looks. Next, click quickly on the shutter button to capture the shot. This will make the shutter close completely. Next, hold the shutter button down until the end. To prevent additional light entering the camera, hold the shutter button down. Once you take the shot, wait a while before you release the shutter. This allows the camera to process the image. While your image processing is taking place, you will be able to view your photos on your screen. Once you are satisfied with the photos, save them onto your computer.